Skip to content Skip to main navigation Skip to footer

Printing and scanning

The printing and scanning service is reserved for Iscte employess (teachers, researchers and technical staff).

The printer “Iscte on printers.iul.intra” is part of the standard installation of the computers assigned to teachers, researchers and technicians of Iscte and can also be installed on their personal computers.

At each self-service point, there is a monochrome printer and a color multifunction printer. Both allow you to staple your work.

Note: Authentication on these devices is carried out using the Iscte identification card, which is personal and non-transferable.

How to Setup the Printing and Scanning Service?

  1. Establish a connection to the Iscte print server by running the \printers.iul.intra command in the Windows search box.

    Note: Outside iscte installations, connect to the VPN before attempting to connect to the Iscte print server.
  2. Authenticate to the print server by entering and remembering Iscte credentials (username and password), as follows:

    Username: Type “IULusername” (e.g., IULxxnes)
    Password: Write the password for the iscte account

  3. Install the “Iscte” network printer driver by using the right mouse button and choosing the “On” option and waiting for the installation to finish.
  4. Open the “Printers and Scanners” menu using, for example, the Windows search box.
  5. Select the printer “Iscte at printers.iul.intra“.
  6. Disable the “Allow Windows to manage the default printer” option.
  1. Access Ricoh Global support through a browser (e.g. Safari, Chrome, or Firefox).
  2. Download the selected driver.
  3. Install from the downloaded driver by opening its DMG file.
  4. Authorize the installation of the driver using the credentials of the local MAC user, with administration privileges.
  5. Access “System Preferences“.
  6. Select “Print and Scan“.
  7. Press the “+” button to add a printer.
  8. Modify the toolbar by right-clicking and choosing “Customize toolbar… “.
  9. Select the “Advanced” icon and drag to the “toolbar“. Finish by pressing “OK“.
  10. Set up the printer “Iscte-PS” by filling in the fields as illustrated below.

    Type: Choose the option “Windows printer via spoolss
    Device: Choose the option “Other device”
    URL: Write “smb://printers.iul.intra/Iscte-PS
    Name: Write “Iscte-PS
    Use: Choose “”RICOH IM C3000 PS“.

  11. Click “Add“.
  12. Select the “Two-sided print unit” option and press “OK“.

    On first use of the print service, you will be prompted for access credentials to the print server.

  13. Authenticate by entering the Iscte credentials (username and password) in the form illustrated in the figure below.

    Username: Type “IULusername” (e.g. IULxxnes)
    Password: Type your Iscte account password
  1. Search for “Terminal” in the Linux search window.
  2. Install the “SMB” client, as illustrated in the next two figures.
  3. Search for “printers” in the Linux search window.
  4. Click “Add a Printer” and then “Add.
  5. Under “New printer“, set as below and click “Next“.

    Select device: Choose “Windows Printer via SAMBA
    SMB printers: Type “printers.iul.intra/Iscte-PS
    “Authentication: Choose “Set authentication details now”
    Password: Write the password of the Iscte accountUsername
    : Write “IULusername” (ex: IULxxnes)

  6. Under “Select the driver,” choose “Select the printer from the database.” Under “Brands“, choose the “Ricoh” tag and click “Next“.
  7. Under “Models“, select “IM C3000“; “Drivers“, choose “Ricoh IM C3000 PS (en) (recommended)” and click “Next“.
  8. Under “Installable Options“, configure as below and click “Next“.

    Option Tray: Choose “Not installed
    Large capacity tray: Choose “Not installed
    Internal Tray 2: Choose “Not installed
    Internal Shift Tray: Choose “Not installed
    External Tray: Choose “Not installed
    Finisher: Choose “Finisher SR3250
    Folding UnitChoose “Not installed
    PostScript: Choose “Post Script Emulation

  9. Under “Describe the printer“, name “Iscte-PS“, the description “Ricoh IM C3000“, the location “Self-service” and click “Apply“.
  10. The “Iscte-PS” printer is ready to print.

Locating Printers and Multifunctionals Devices

Using the Printing an Scanning System

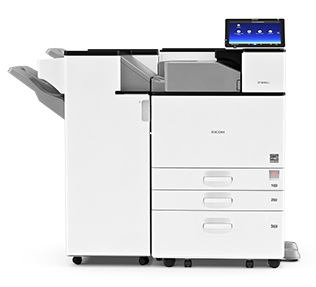
  1. Tap the tatil screen to activate the equipment (printer or multifunction) and select the “Follow-You Printing” option.

    Follow-You Printing

  2. Bring the Iscte card closer to the card reader.


  3. Select the documents you want to print and tap “Imprimir” (Print).


  4. Log out using the Iscte card or by tapping “End Session“.

  1. Tap the touch screen to enable multifunction and select one of the following options (“Scan-to-Me” (for scanning documents with few pages) or “Scan-to-email” (to scan documents that exceed the maximum size allowed by email).

    scan-to-me

    or

  2. Bring the Iscte card closer to the card reader.

  3. Place the original document feeder, taking into account the orientation.

  4. Check/change the recipient’s address (pre-populated with the authenticated user’s email).

    Scan-to-Me – Add CC/

    Digitalizar-para email –Change recipient and add CC/

  5. Tap “Digitalizar“ (Scan).

  6. Log out using the Iscte card or by tapping “EncerrSessão“ (End Session).

  1. Tap the touch screen to activate the multifunction and select the “Enable Copier” option.

  2. Bring the Iscte card closer to the card reader.

  3. Place the original document feeder, taking into account the orientation.


  4. Tap “Iniciar“ (Start).


  5. Log out using the Iscte card or by tapping “EncerrSessão“ (End Session).

How to Activate the Iscte Card?

  1. Access the Fénix platform at https://fenix.iscte-iul.pt/
  2. Access the tab “Login Page“.
  3. Authenticate using the Iscte account credentials (e.g. xxnes@iscte-iul.pt and its password).
  4. Go to the “Personal” tab.
  5. Choose the “Manage Cards” option, in the “Cards” section, on the left-hand side menu.
  6. Identify the Iscte card you want to activate in the list of “Other personal cards” and click on the respective link “Activate“. As only one active card is allowed, performing this action will deactivate the current active card.


Find out more about Iscte Card