Iscte User Account
Atualizado/Updated: 2024-11-19

SIIC assigns user accounts to Iscte community.
A user account is a collection of settings and information that defines a user on a computer system. Here are some key points about user accounts:
-
- Unique Identification: Each user account has a unique username and password that allows the user to log in and access their personalized settings, files, and applications.
- Types of Accounts
- Administrator Accounts: Have full control over the system, including installing software and changing settings.
- Standard Accounts: Have limited permissions, suitable for everyday tasks.
- Guest Accounts: Temporary accounts with very limited access.
- Customization: User accounts allow for personalized settings, such as desktop backgrounds, browser favorites, and application preferences.
- Security: Helps keep data private and secure by ensuring that only authorized users can access certain files and settings.
For users of type fenix010101
-
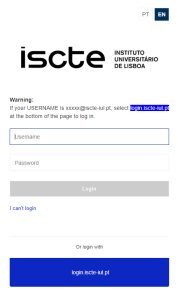
- Go to https://fenix-mais.iscte-iul.pt and choose “EN” interface.
- Cick on “I can’t login”.
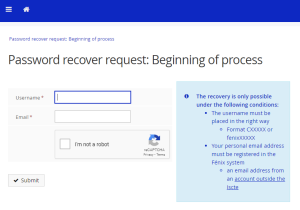
- Fill in the fields “Username“, “Email” (an email address from an account outside the Iscte that must be registered in the Fénix system), check “I´m not a robot” and click on “Submit“.
- Go to https://fenix-mais.iscte-iul.pt -> “MyFenix” -> “Other Services” -> “Ativate Account“.
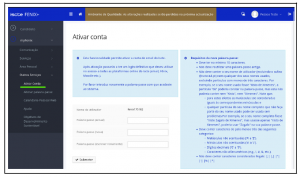
- Set a new password (verify password requirements).
- Click on “Submit“, to get Iscte’s username (like xxnes@iscte-iul.pt).
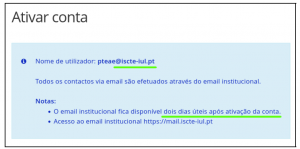
The Iscte username allows access to the institutional email and the ‘Okta’ platform. - Okta sends a notification to your personal email address (see image below):
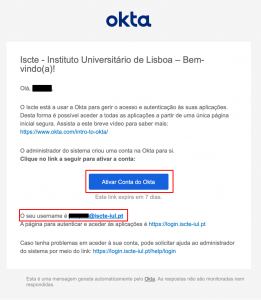
- Click on “Ativar Conta do Okta“.
- Set a new password and add a mobile phone number.
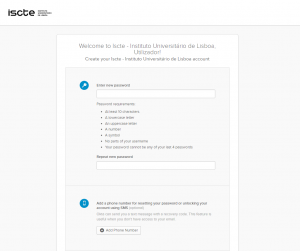
- Select an image and click on “Create My Account“.
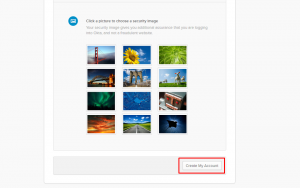
TIP: Access to Iscte’s internal information systems and Office 365 will be available 48 hours after the account is activated. The page to authenticate and access the applications is: https://login.iscte-iul.pt/.
For users of tipy tipo xxnes@iscte-iul.pt
-
- Check your personal mailbox to see if you have received a notification from Okta.

- Click “Ativate Okta Account“.
- Set a new password and add a mobile phone number.

- Select an image and click on “Create my account“.

TIP: Access to Iscte’s internal information systems and Office 365 will be available 48 hours after the account is activated. The page to authenticate and access the applications is: https://login.iscte-iul.pt/.
- Check your personal mailbox to see if you have received a notification from Okta.
The account is personal and non-transferable. By way of example, the user Xisto Ximenes has the following credentials:
Username: xxnes@iscte-iul.pt
Email address: Xisto_Ximenes@iscte-iul.pt (student) / Xisto.Ximenes@iscte-iul.pt (employee)
Password: Senha.2024
The Iscte account password must comply with the following requirements:
-
-
- Must be at least 10 characters long.
- You should not reuse an old password.
- It must not contain your username (excluding the @iscte-iul.pt suffix) or any of its used names, excluding particles that are less than three characters long.
- It should not contain characters considered illegal (;, , , ‘, ‘, %, *, blank).
- It must contain characters from at least three of the following categories:
- Capitals not accented (‘A’ to ‘Z’).
- Lowercase not accented (‘a’ to ‘z’).
- Decimal digits (‘0’ to ‘9’).
- Non-alphanumeric characters (!, #, &, etc.).
-
In order to recorver your password, please perform the following steps:
-
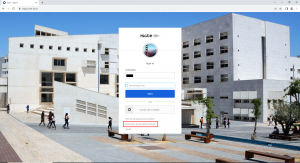
- Go to https://login.iscte-iul.pt/
- Click on “Precisa de ajuda para aceder?“.
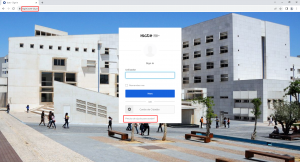
- Follow the link “Esqueceu-se da palavra-passe?“.
- Fill in the field “Email or Username“.
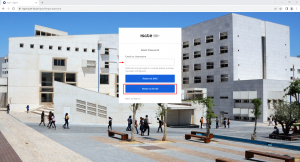
- Press “Reconfigurar via e-mail” / “Reset via Email“.
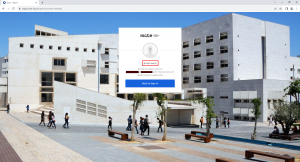
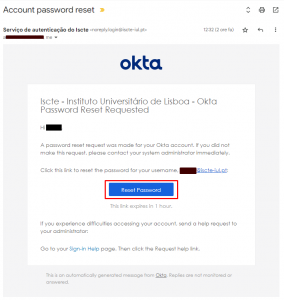
- Access your personal e-mail account. You should have received an automatic message from <noreply.login@iscte-iul.pt>.
- Click on “Redefina a senha” / “Reset password“.
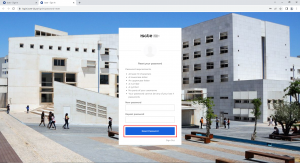
- Type a new password your password and then click “Redefinir senha” / “Reset password“.
-
- Passwords must be confidential.
- Do not keep passwords on paper or in visible places.
- Change passwords regularly, even on systems that do not require you to do so.
- Do not save automatically in systems (e.g. browsers).
- Don’t use the same passwords in academic and personal contexts.
- To create a secure password, think of an easy-to-remember phrase and then define a method for turning that phrase into a password.
For example:
Phrase: how to set a secure password in 2024!
Method: first letter of each word, third word in capitals, use only the last two digits of numbers and keep special characters.
Password: htSETasp24! (Do not use this example).
