Clearooms
Booking system for desks and meeting rooms in Building 4 – Iscte_Knowledge and Innovation.
![]()


Meeting Rooms in Clearooms provides you with an easy and flexible way to view and book your meeting rooms.
-
- Availability shown alongside desk availability
- All rooms for an Office on a single page view
- Mobile App for booking and editing meetings
- Wall Display App for on site visibility of a rooms availability
Booking a room from the floor plan
From Offices the details of the days meetings will be displayed and you can click and drag on the diary to create a meeting, when selected a meeting details page will open for you.
-
- Add attendees from the list of users or type in a full emails address.
- Once you add a title and description you can save the meeting.
- Attendees will be invited via Outlook/Google on integrated rooms.
- If your room is integrated with Microsoft the option to make it a teams meeting is available.
- Custom Branding is visible if your room is linked to a device for displaying in the office.
- Making the meeting private will hid the title from others in the portal
Booking a room from the mobile app
To book from the mobile app pinch and zoom on the room you wish to book and click the icon.
If there are bookings already on the day you will se them and be offered a “book” option button. If there are no bookings for that day you will enter the calendar and then you can click “Book” at the top right.
You can add a subject, description and make the meeting “private” as well as adding attendee’s (Integrated rooms only).
Click save when you have finished.
Booking from the meeting room page
From the meeting room page click on any green section of the day view. The booking process is the same as in the offices view.
Details of the days meetings will be displayed and you can click and drag on the diary to create a meeting, when selected a meeting details page will open for you.
-
- Add attendees from the list of users or type in a full emails address.
- Once you add a title and description you can save the meeting.
- Attendees will be invited via Outlook/Google on integrated rooms.
- If your room is integrated with Microsoft the option to make it a teams meeting is available.
- Custom Branding is visible if your room is linked to a device for displaying in the office.
- Making the meeting private will hide the title from others in the portal.
TIP: You can return to the booking at any time to edit it. Only the organiser can edit an existing meeting.
-
- To get your unique URL, head to My Bookings
- Sign in with your Iscte-IUL credentials (eg., xxnes@iscte-iul.pt and you password).
- The link is available by clicking Add to Calendar at the top right of the page.
![]()
-
- Clicking this link will show a pop-up which contains your unique URL. Click the copy icon at the right of the text box to copy the URL to your clipboard.
- You can use this address to subscribe to events in any good calendar software. Guides have been created for the following:
- Calendar (MAC IOS)
- Google Calendar
- Outlook365
Calendar (MAC IOS)
-
- Open your calendar app, and head to the toolbar.
- Click File -> New Calendar Subscription.
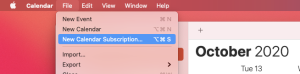
- Paste the URL you copied into the Calendar URL text box and click Subscribe.
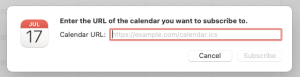
- On the next screen, make any adjustments you desire – including setting the refresh interval and click OK.

Your events will now synchronise automatically to your MacOS Calendar.
Google Calendar
-
- Head to Google Calendar at https://calendar.google.com and look for the list of calendars down the left-hand side.
- You should see Other Calendars.
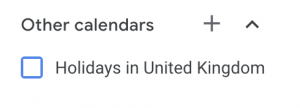
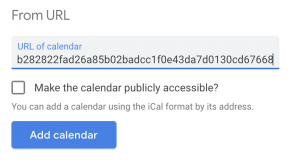
- Click the + icon to open up the pop-up and select From URL.
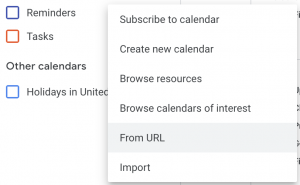
- Paste the URL you copied into the input box and click Add Calendar.
Your events will now synchronise automatically to Google Calendar.
TIP: Please be aware that we have no control as to how often Google chooses to refresh the events, it can typically take a few hours between refreshes but Google quotes 8 hours between refreshes.
Outlook365
-
- Head to your Office 365 Calendar at https://outlook.office.com/calendar
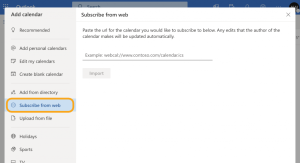
- Click the hamburger menu to toggle the left pane then click Add Calendar.
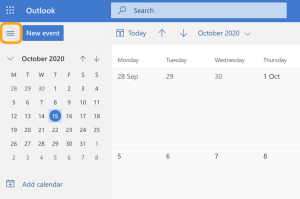
- From the menu that appears, select Subscribe from Web and paste the URL you copied into the box.
Your events will now synchronise automatically to your Outlook 365 Calendar.
If you are a member of the Iscte community (worker or student), perform the steps describe here.